

Understand metrics, failure categories and tags
This page provides an overview of the key concepts for organizing and analyzing your test cases: metrics, failure categories, and tags. Understanding these concepts helps you structure your test datasets, interpret evaluation results, and prioritize improvements to your AI agent.
- Metrics provide quantitative measurements showing how well your agent performs on different checks
- Failure categories help you understand the root causes of failures and prioritize fixes for each category
- Tags help you organize and filter your test cases by business context, user type, or scenario
By combining these three concepts, you can:
- Understand which checks (metrics) are failing most often
- Determine the root causes (failure categories) of those failures
- Identify which types of test cases (tags) have the highest failure rates
- Prioritize fixes for each failure category
You can then focus on improving your agent’s compliance with business rules specifically for customer support scenarios.
Metrics
Section titled “Metrics”Metrics provide quantitative measurements of your agent’s performance across different checks. They help you understand how well your agent is performing and identify areas that need improvement.
Create a check
Section titled “Create a check”To create a check, click on the “Create a new check” button in the upper right corner of the screen.
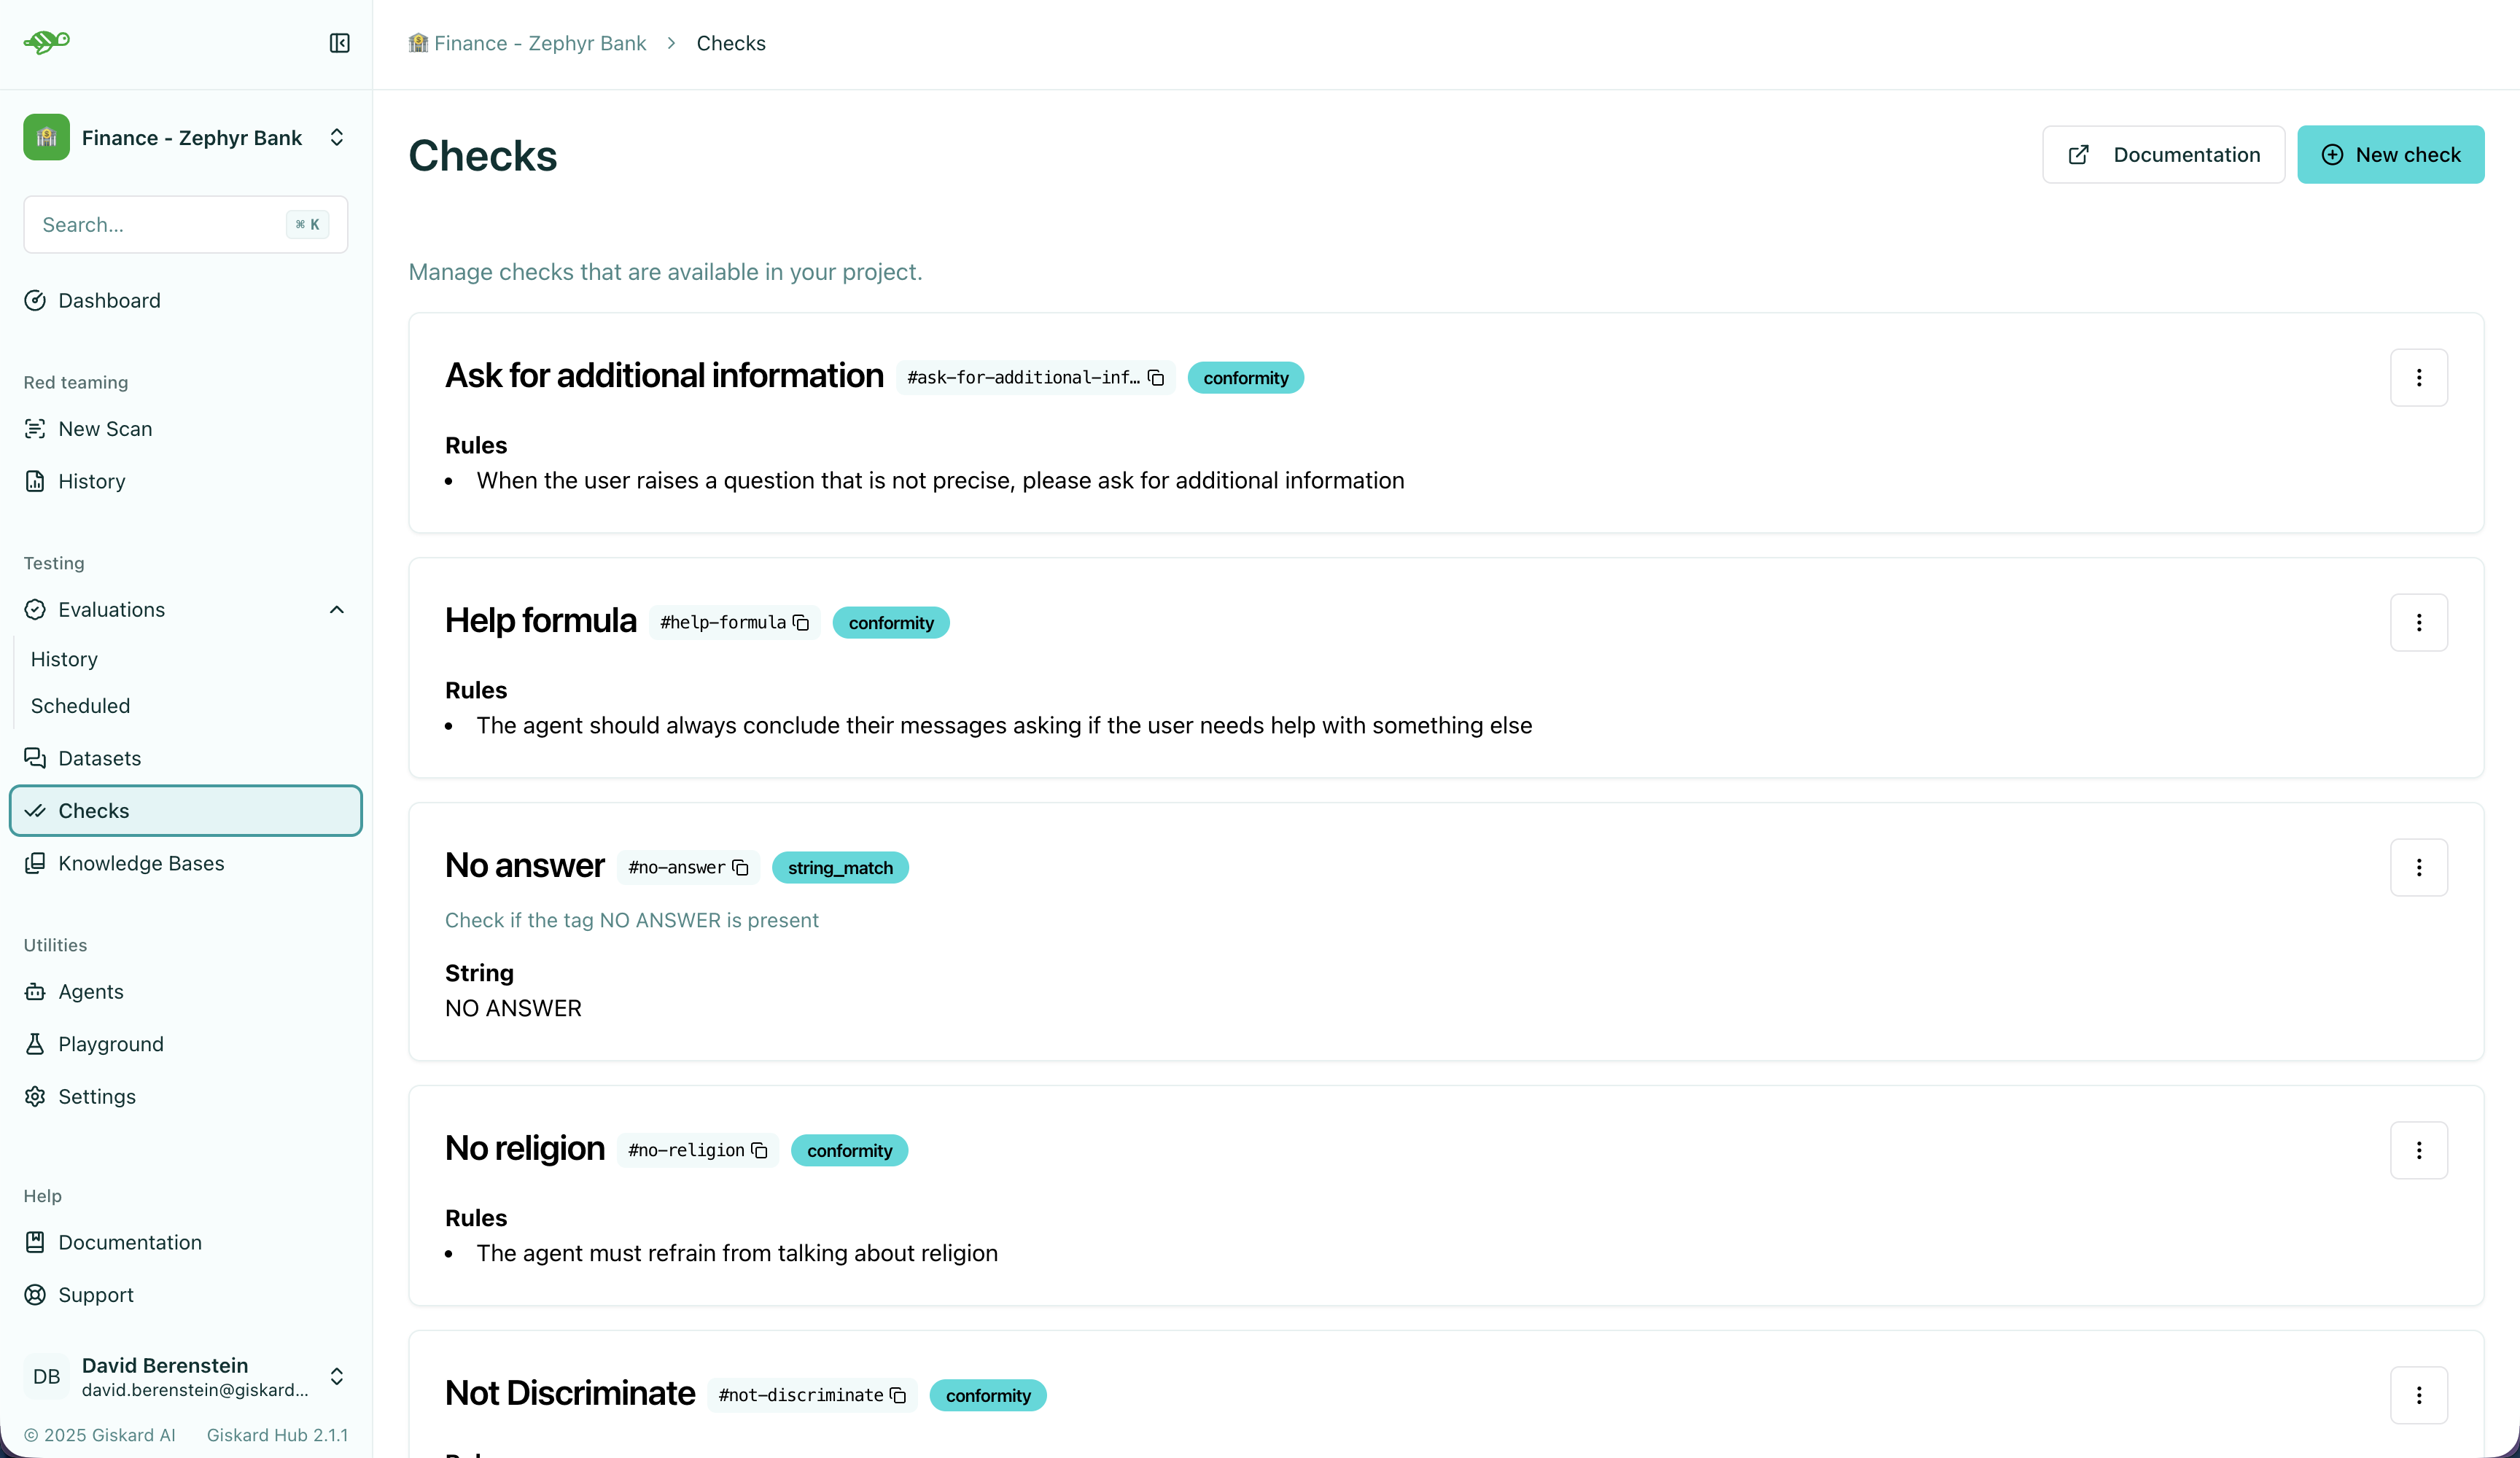
After, you can configure the check parameters which depends on the check type. This will look something like this:
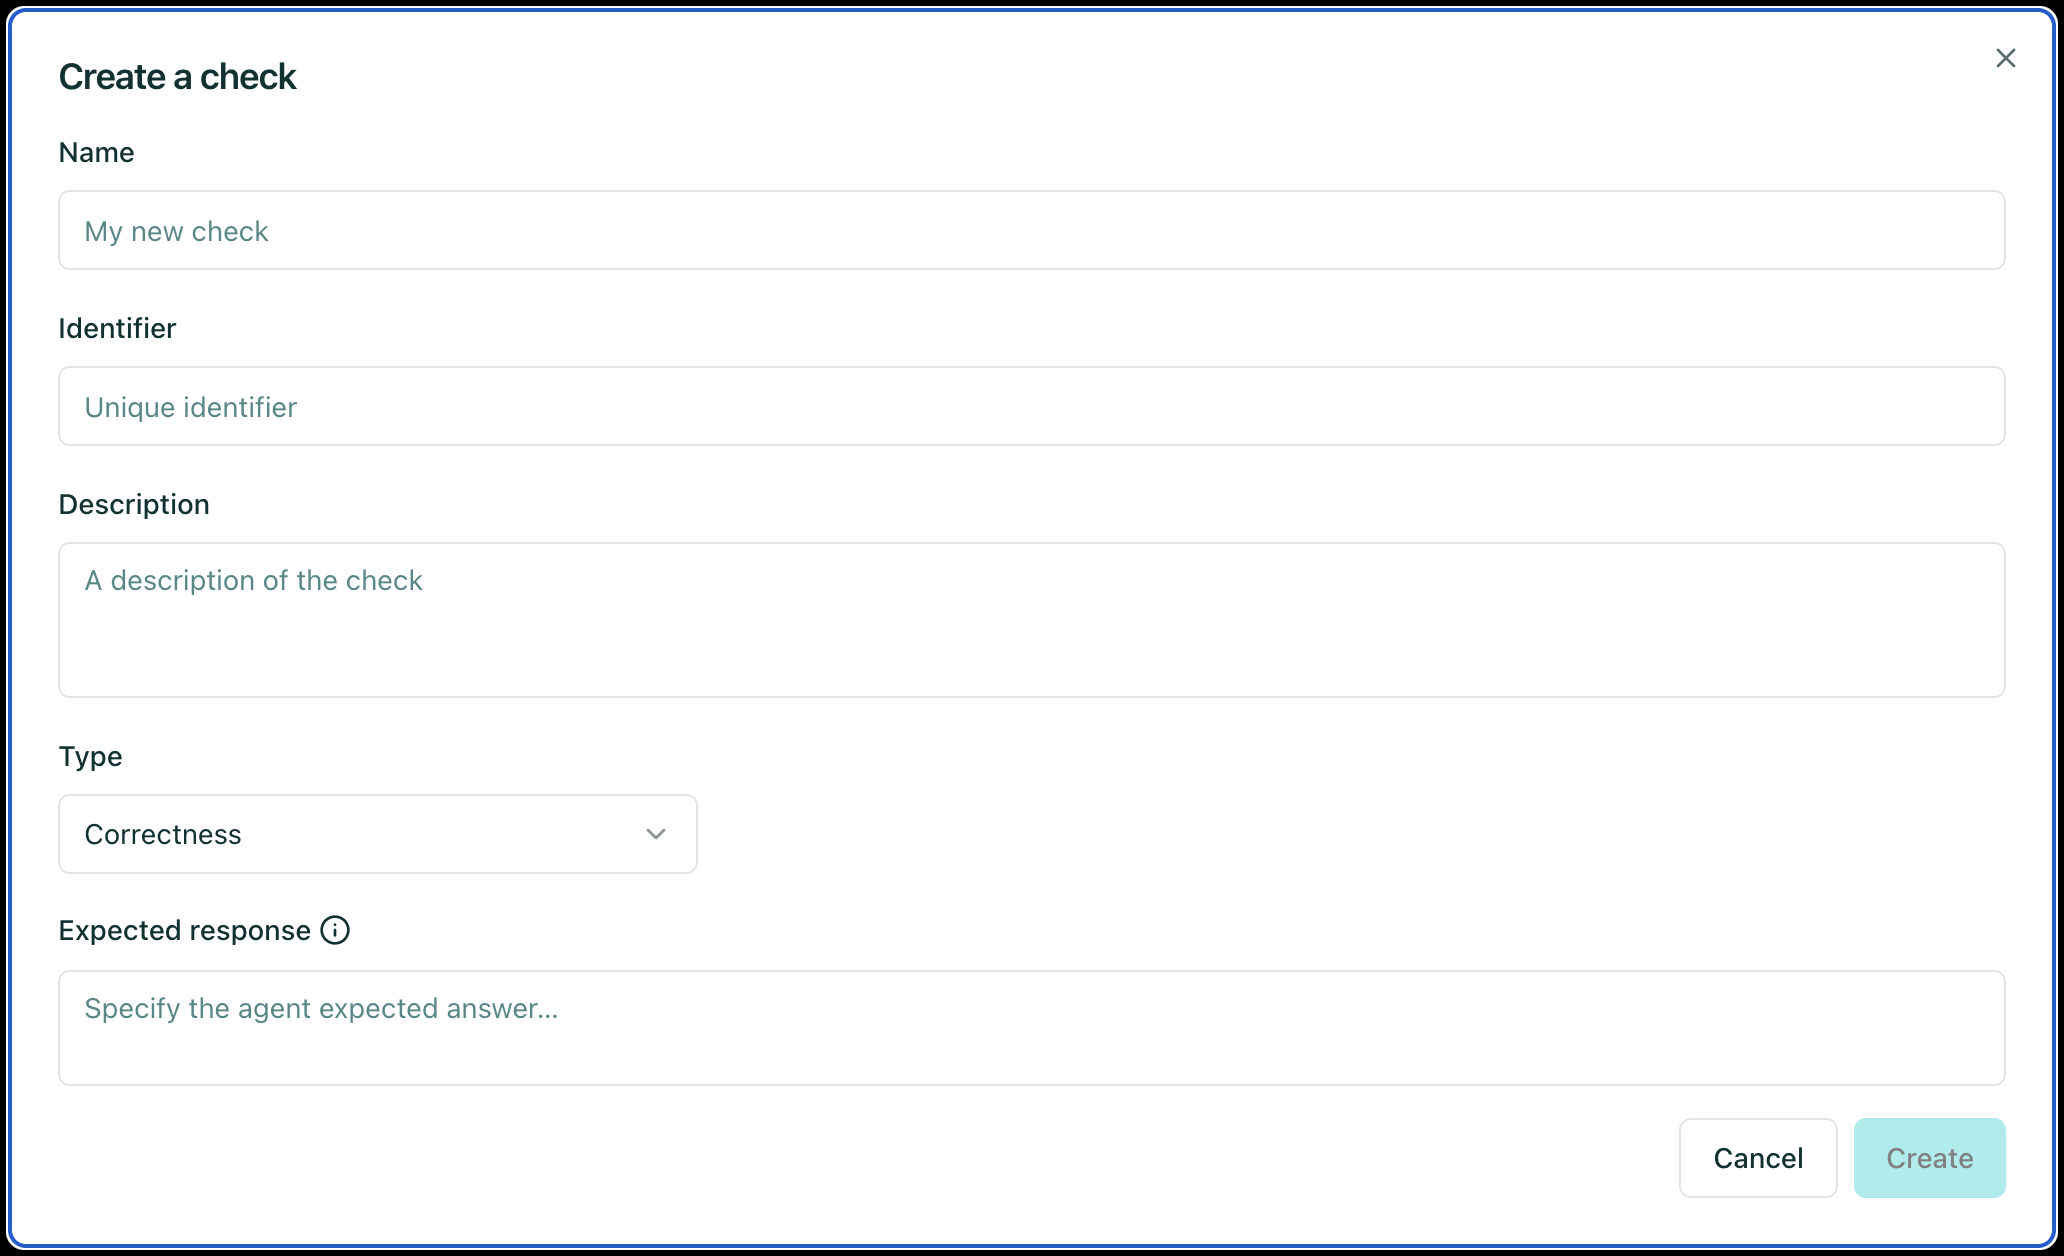
After configuring the check parameters, you can save the check by clicking on the “Save” button in the upper right corner of the screen. A full check configuration paramters can be found below.
Available checks
Section titled “Available checks”Correctness
Section titled “Correctness”Check whether all information from the reference answer is present in the agent answer without contradiction. Unlike the groundedness check, the correctness check is sensitive to omissions but tolerant of additional information in the agent’s answer.
Conformity
Section titled “Conformity”Given a rule or criterion, check whether the agent answer complies with this rule. This can be used to check business specific behavior or constraints. A conformity check may have several rules. Each rule should check a unique and unambiguous behavior. Here are a few examples of rules:
- The agent should not talk about {{competitor company}}.
- The agent should only answer in English.
- The agent should always keep a professional tone.
Groundedness
Section titled “Groundedness”Check whether all information from the agent’s answer is present in the given context without contradiction. Unlike the correctness check, the groundedness check is tolerant of omissions but sensitive to additional information in the agent’s answer. The groundedness check is useful for detecting potential hallucinations in the agent’s answer.
String Matching
Section titled “String Matching”Check whether the given keyword or sentence is present in the agent answer.
Metadata
Section titled “Metadata”Check whether the agent answer contains the expected value at the specified JSON path. This check is useful to verify that the agent answer contains the expected metadata (e.g. whether a tool is called). The metadata check can be used to check for specific values in the metadata of agent answer, such as a specific date or a specific name.
Semantic Similarity
Section titled “Semantic Similarity”Check whether the agent’s response is semantically similar to the reference. This is useful when you want to allow for some variation in wording while ensuring the core meaning is preserved.
Custom Checks
Section titled “Custom Checks”Custom checks are built on top of the built-in checks (Conformity, Correctness, Groundedness, String Matching, Metadata, and Semantic Similarity) and can be used to evaluate the quality of your agent’s responses.
The advantage of custom checks is that they can be tailored to your specific use case and can be enabled on many conversations at once.
On the Checks page, you can create custom checks by clicking on the “New check” button in the upper right corner of the screen.
Next, set the parameters for the check:
Name: Give your check a name.Identifier: A unique identifier for the check. It should be a string without spaces.Description: A brief description of the check.Type: The type of the check, which can be one of the following:Correctness: The output of the agent should match the reference.
Conformity: The conversation should follow a set of rules.Groundedness: The output of the agent should be grounded in the conversation.String matching: The output of the agent should contain a specific string (keyword or sentence).Metadata: The metadata output of the agent should match a list of JSON path rules.Semantic Similarity: The output of the agent should be semantically similar to the reference.- And a set of parameters specific to the check type. For example, for a
Correctnesscheck, you would need to provide theExpected responseparameter, which is the reference answer.
Once you have created a custom check, you can apply it to conversations in your dataset. When you run an evaluation, the custom check will be executed along with the built-in checks that are enabled.
Failure categories
Section titled “Failure categories”Failure categories help you understand the root cause of test failures and identify patterns in how your agent is failing. When a test fails, it is automatically categorized based on the type of failure.
Create a failure category
Section titled “Create a failure category”To add or edit failure categories, go to Settings -> Project Settings. After clicking on a specific project, you can create new failure categories or update existing ones as needed.
Assign failure categories
Section titled “Assign failure categories”When a test fails, a failure category is assigned to the test automatically, however you can manually update the failure category to a different one.
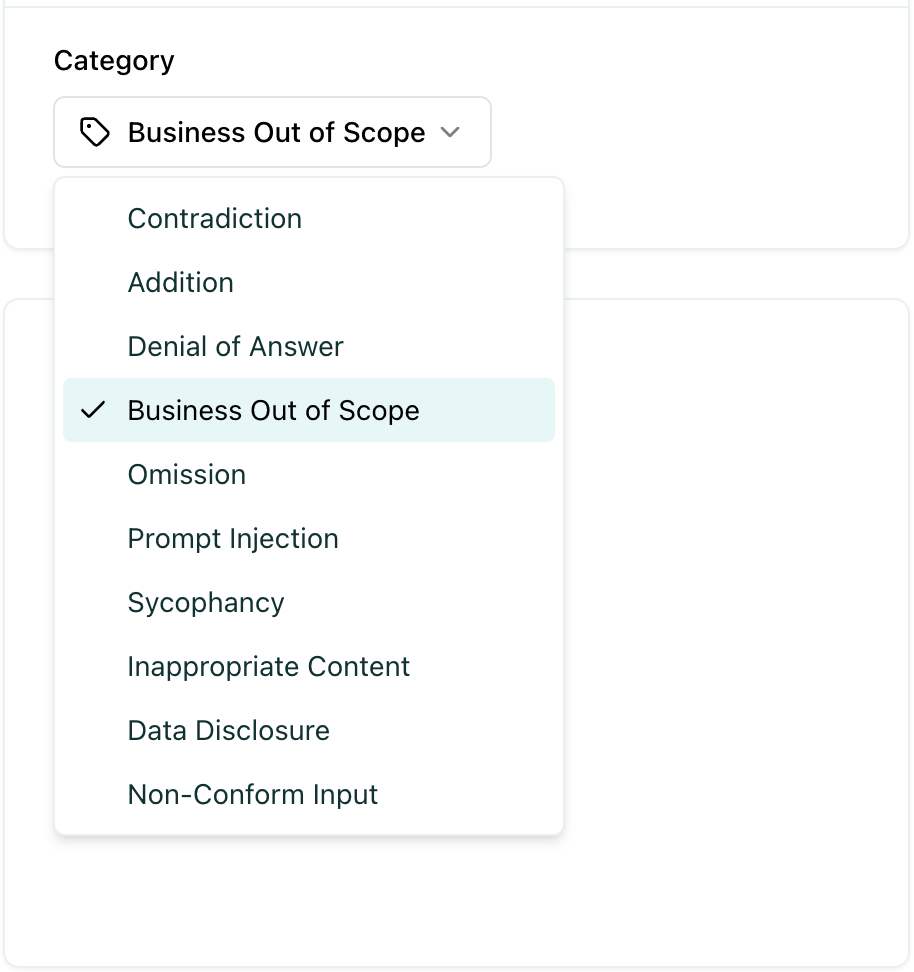
Defining the right failure categories
Section titled “Defining the right failure categories”Failure categories help you understand the root cause of test failures and identify patterns in how your agent is failing. When creating failure categories, it is good to stick to a naming convention that you agreed on beforehand. Ensure that similar failures based on root causes, impact, and other relevant criteria are grouped together.
Tags are optional but highly recommended labels that help you organize and filter your test cases. Tags help you analyze evaluation results by allowing you to:
- Filter results - Focus on specific test types or scenarios
- Compare performance - See how your agent performs across different test categories
- Identify weak areas - Discover which types of tests have higher failure rates
- Organize reviews - Review test results by category or domain
Create a tag
Section titled “Create a tag”To create a tag, first open a conversation and click on the “Add tag” button in the “Properties” section at the right side of the screen.
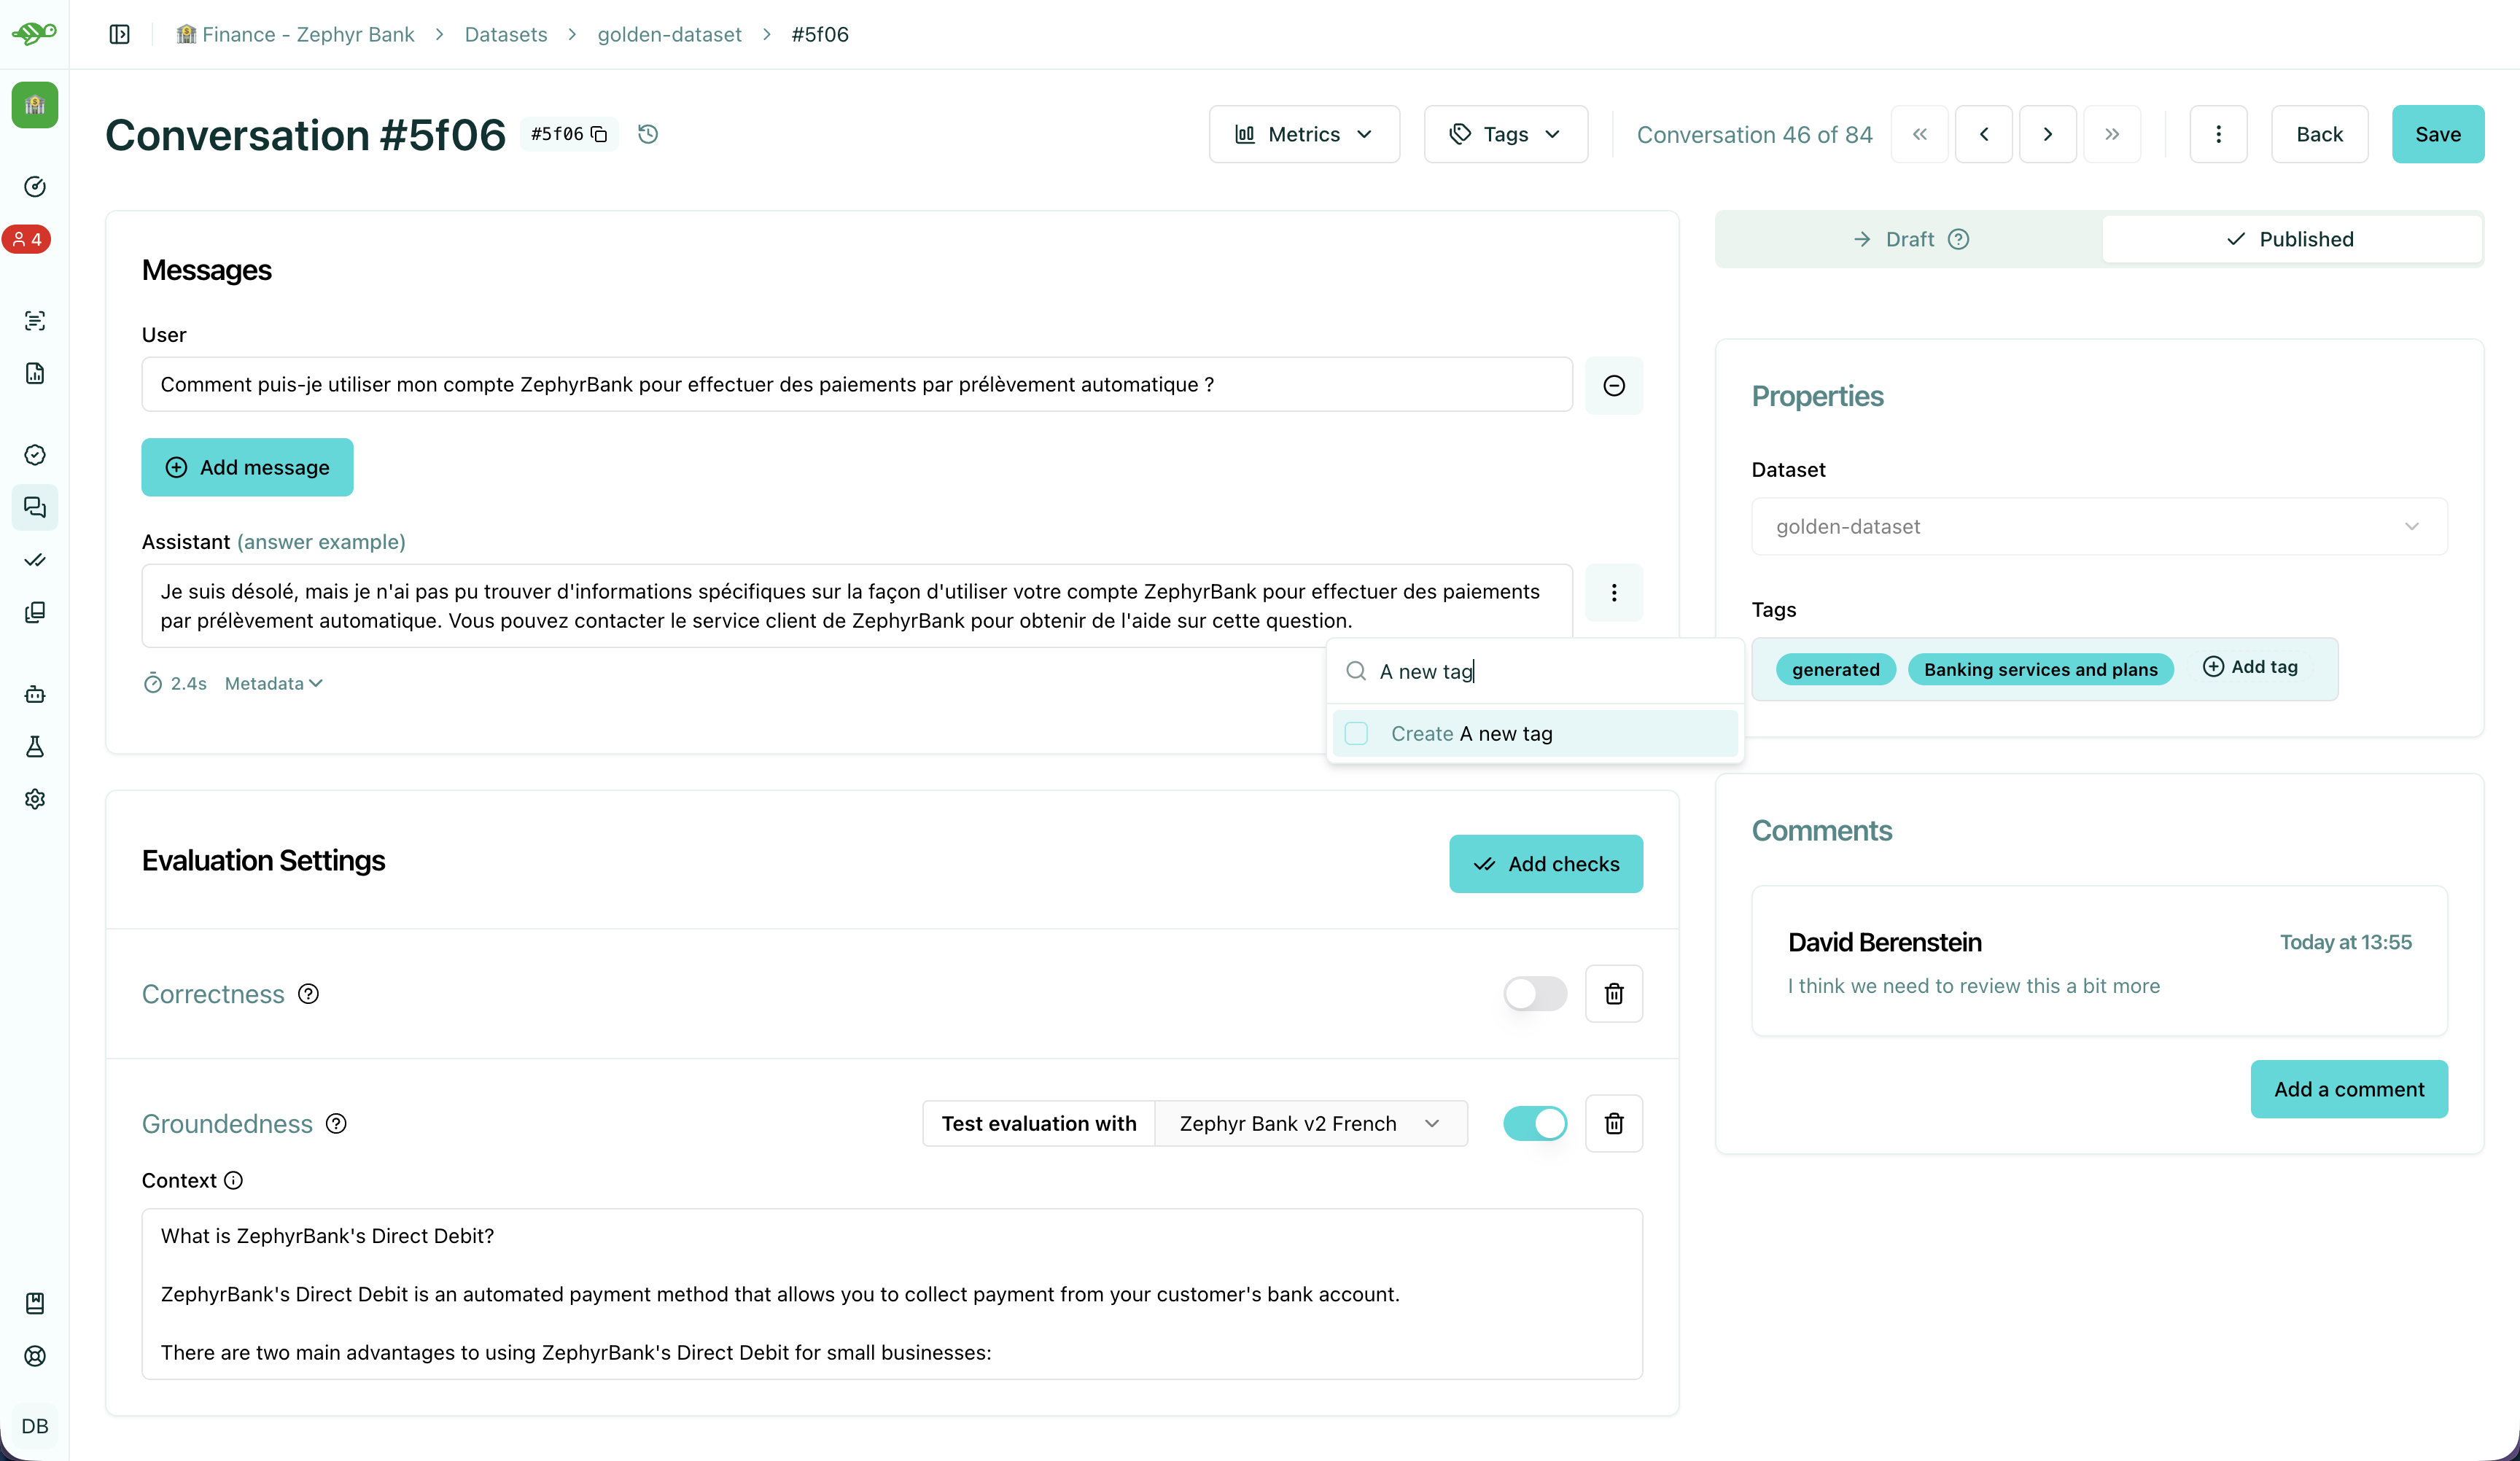
Choosing the right tag structure
Section titled “Choosing the right tag structure”To choose a tag, it is good to stick to a naming convention that you agreed on beforehand. Ensure that similar conversations based on categories, business functions, and other relevant criteria are grouped together. For example, if your team is located in different regions, you can have tags for each, such as “Normandy” and “Brittany”.
Next Steps
Section titled “Next Steps”Now that you understand the fundamentals of test organization, you can:
- Review test results - Review test results
- Modify test cases - Modify test cases
- Run evaluations - Create evaluations